
Time-based recovery
In this reference design, we look at a variation of the savings wallet reference design. Specifically, we design a wallet application that allows users to enable a simple recovery path in order to provide even more fault tolerance than a regular multi-key wallet.
Prior reading #
The use case for this design is relatively simple. However, we will be referencing some advanced bitcoin concepts and capabilities that are provided by Miniscript. If you are unfamiliar with the topic, please read the custom spending conditions page before diving deeper into this reference design.
Use case #
A multi-key wallet offers a number of advantages, especially for storing large amounts of bitcoin. Therefore, Bob and Alice, want to create a 2-of-3 multi-key wallet for their savings. Bob will hold the first key while his wife, Alice, will hold a second key. In addition, they have the third key locked away in a safety deposit box.
However, the couple worries about a situation where they lose access to two of the keys. In that case, they would lose all of their savings. To protect themselves against this scenario, our application offers them the possibility to enable a recovery path, which automatically lowers the amount of signatures needed to 1-of-3 after 6 months. This will allow them to lose two keys and still be able to recover their savings.
Process overview #
Below is a description of the high-level phases involved in setting up and using the wallet described above. For this reference design, we will be focusing mainly on the user flows for wallet creation and recovery.
- Wallet creation
- Choose the primary key scheme used for spending under normal circumstances (2-of-3 in our case).
- Register the signing devices to the wallet by importing the three extended public keys keys.
- Enable the recovery path.
- Wallet backup
- Import the wallet to co-signer application
- Spending
- Recovery
Creating the wallet #
The process for creating the wallet is very similar to the one that is covered in the savings wallet reference design. The main differences for this design is that all signing keys are hardware wallets (external signers) and that our application offers a recovery path.
The primary key scheme #
Let’s start creating the wallet. For our product, we assume that our users already have a basic understanding of how bitcoin wallets work. Therefore, the application lets them choose from a couple of the most common key schemes.
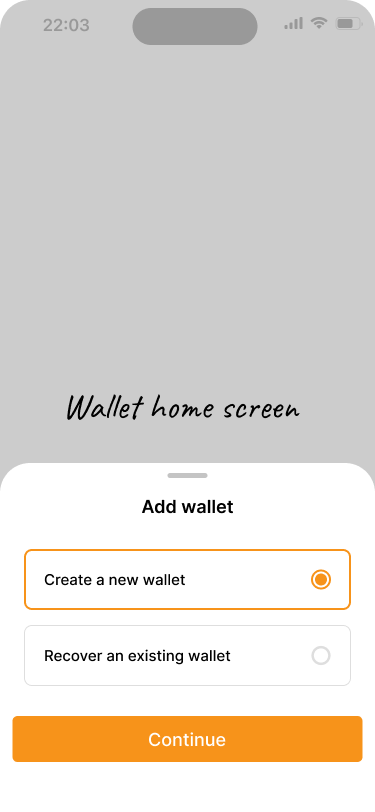
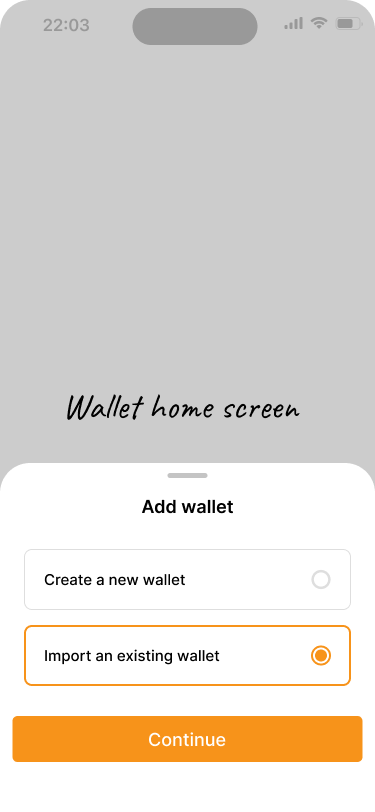
Users create a new wallet or import an existing one.
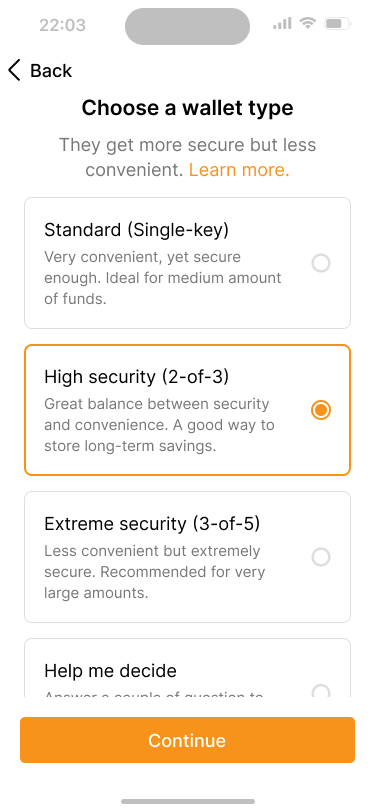
The application suggest common setups. If users are unsure, they can go through a guided set of questions to determine a suitable setup.
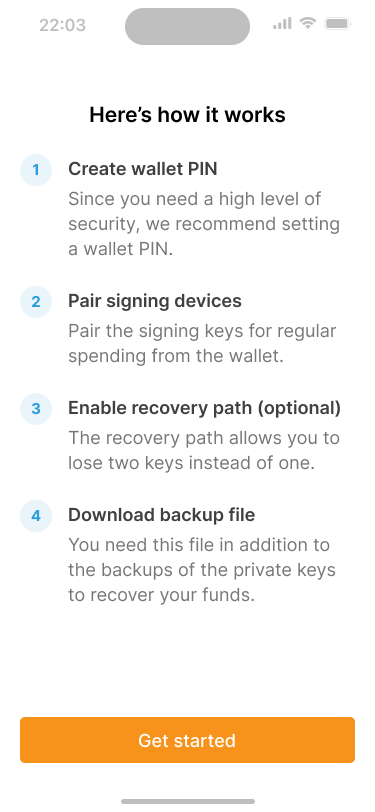
Before starting the wallet creation process, the application tells users what the process will look like.
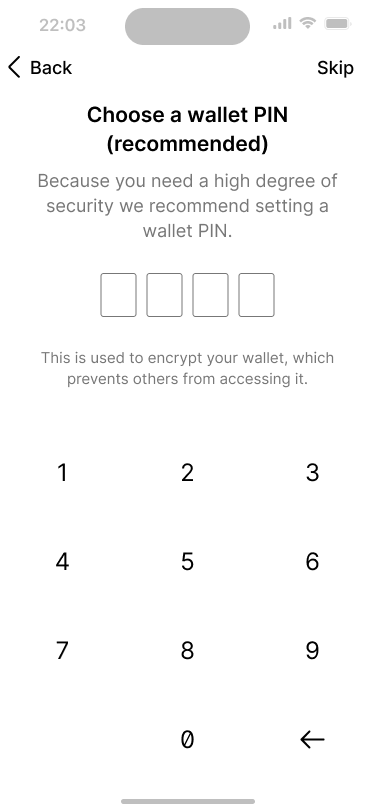
Users can choose a PIN to protect the wallet in the application.
Some users may need help deciding on the best solution for them. Our application gives them an option to run through a set of questions about their specific needs and suggests a setup based on the answers. Power users will find a “Custom” option, which gives them the freedom to define a key scheme from scratch.
If you are designing your own product, it is important to think about the target audience to determine the options that you offer.
Importing the co-signer public keys #
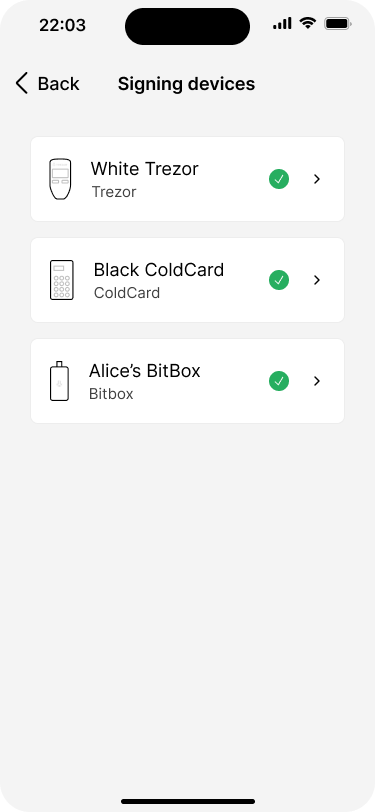
After the basics have been defined, the extended public keys (XPUBs) of the designated signing devices need to be imported to the wallet application. First, Bob imports the XPUB from his Trezor and a ColdCard that will be placed in the safety deposit box. After that, he hands the phone to Alice, so that she can do the same with her BitBox.
Another way to do this would be for Alice to export her XPUB and send it to Bob over a secure channel.
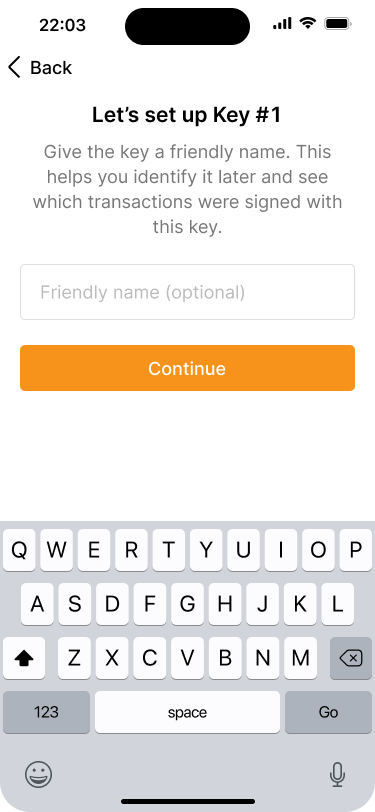
You can enter a friendly name for this key. This helps to identify them later and also see which keys signed which transactions.

The exact import flow will vary, depending on the specific signing device that is being used.
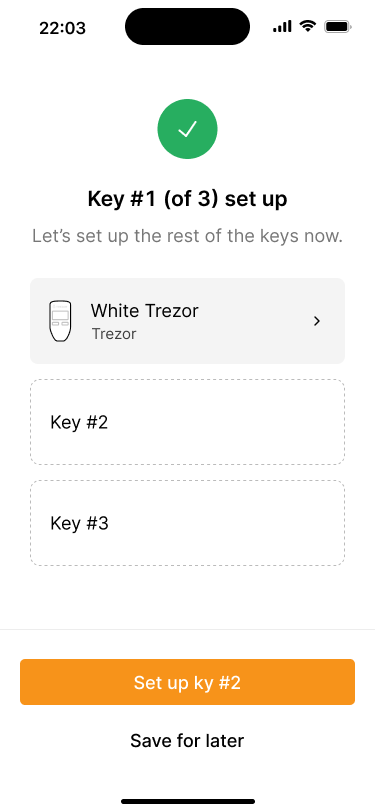
After a key is imported, the app shows a summary of the current state of the key set. Tapping on the key will show it’s details.

Repeat the import step for keys number two and three.
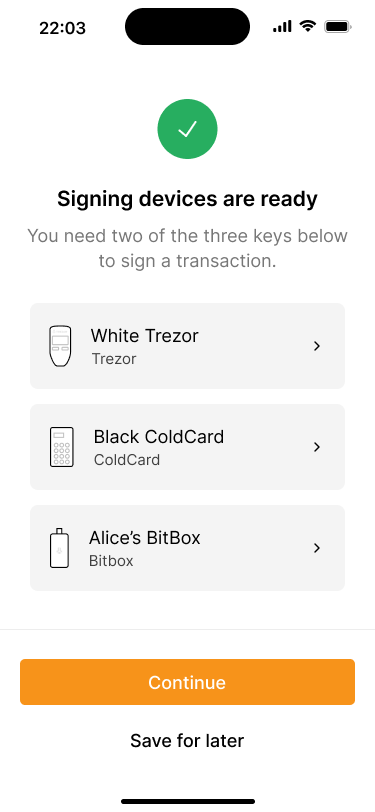
All three keys for the primary key set have been imported.
Enabling the recovery path #
The final step of the wallet creation flow is to enable the recovery path. Although they are a great way to increase fault tolerance, and thus prevent loss of funds, we want this option to be treated as an optional feature that is not forced on users. That means we need to provide users with all the information they need to make an appropriate decision.
If the recovery path is enabled, our application uses smart defaults to propose a suitable key scheme, based on the wallet. Since we are creating a 2-of-3 wallet, the application will suggest a 1-of-3 recovery path. This recommendation will be different for other wallet types.
It also suggests that the recovery path will be unlocked after 6 months, if the funds have not been spent. However, users can always choose a different timeframe that better suits their situation.
In addition, our application also provides users with the option to set reminders at different times before the recovery path unlocks.
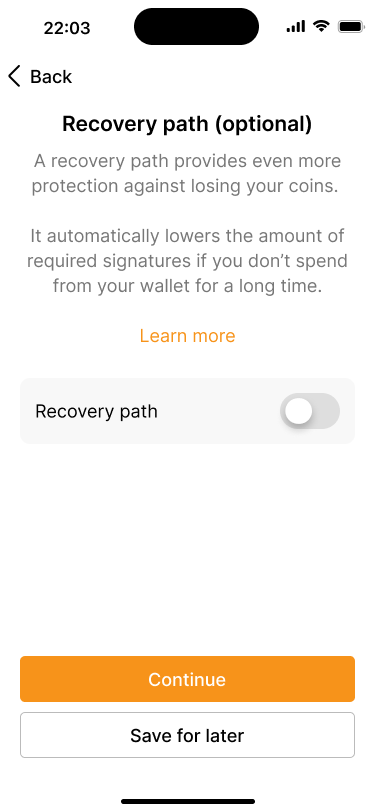
Users can choose to enable a recovery path.
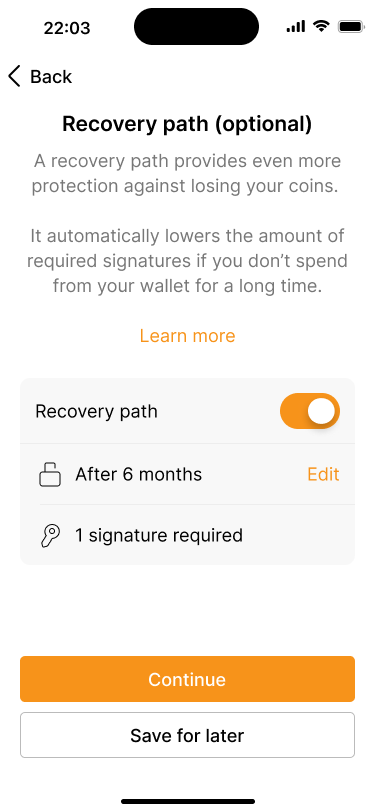
By default, the recovery path unlocks after 6 months. Users can edit this setting, though.
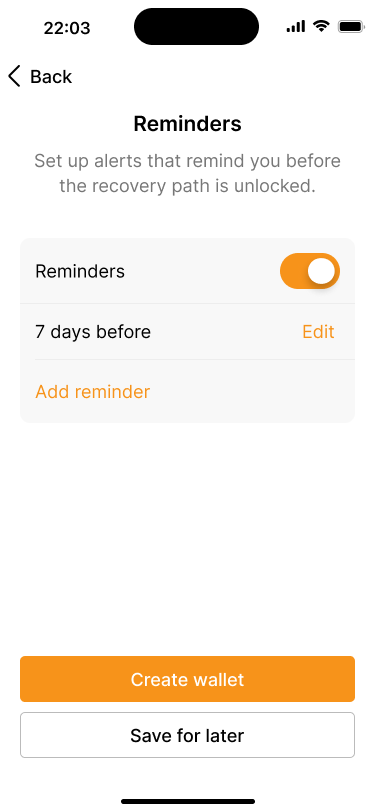
Users can also enable reminders to alert them, before the recovery path unlocks.
Note that the scope of this feature is quite narrow because it is aimed at an audience with basic knowledge of bitcoin. You might want to offer more customization options, based on your own target audience.
Save for later #
As you can see, creating a multi-key wallet involves a lot of steps in the wallet application as well as on the corresponding signing devices. This can take quite a while, depending on the chosen key scheme. It also requires that users have all extended public keys ready and available beforehand.
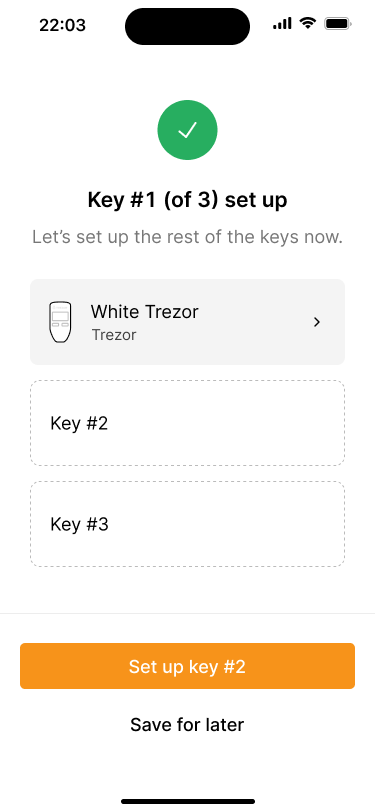
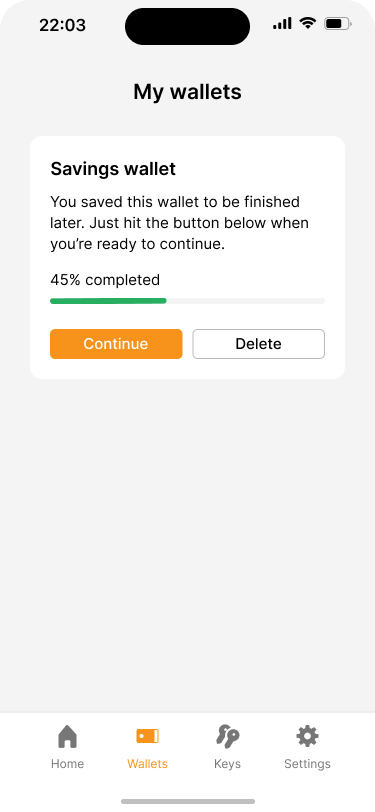
It is likely that not all users will be able or willing to go through the entire process in one setting. This is why our application offers a feature called “Save for later”. It allows users to pause the wallet creation process at any time and pick it up later. The application saves the current state of the wallet locally on the device.


Wallet backup #
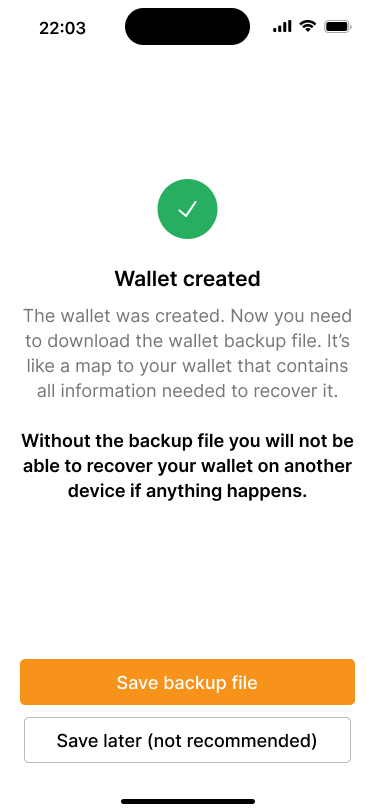
Enabling the recovery path is the final step before the wallet is created on-chain. Once it has been finalized and can be used, our application prompts the user to download the wallet backup file. This is important because, for multi-key wallets, it is not enough to back up the private key to recover the wallet.
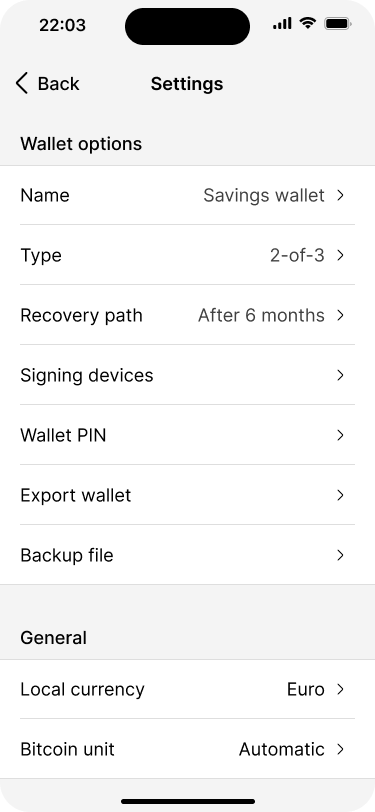
The backup file contains all the information necessary to recover the wallet, except the private keys. This means that it is ok to store the file digitally in a password manager, for example. However, since it contains all extended public keys, anybody who finds this file can potentially monitor all transactions in real time.
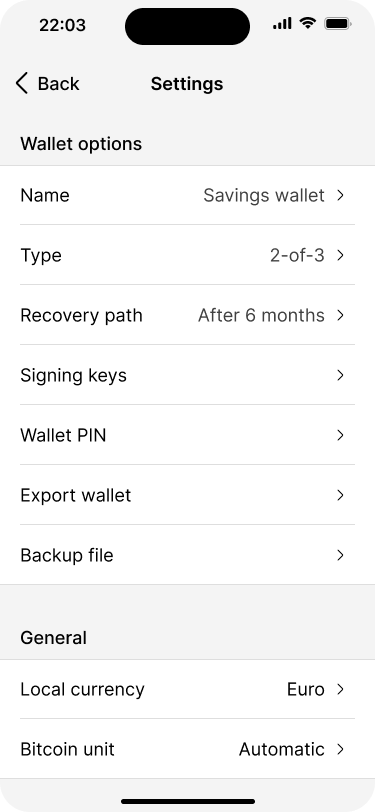
Because users might not want to back up the wallet right away, users will also be able to access the backup file and other important information on the wallet settings page at any time.
Co-signer wallet import #
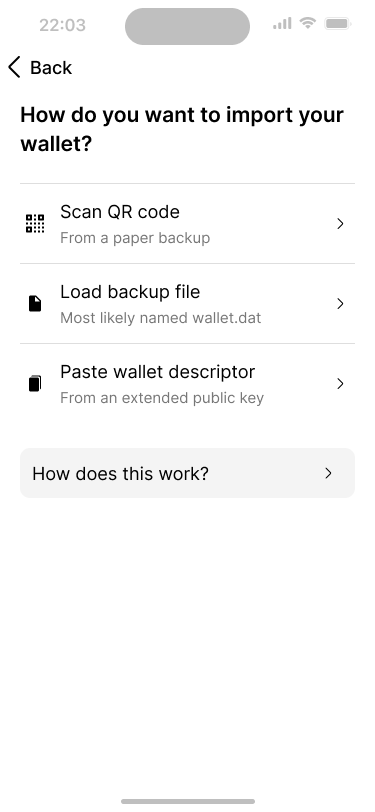
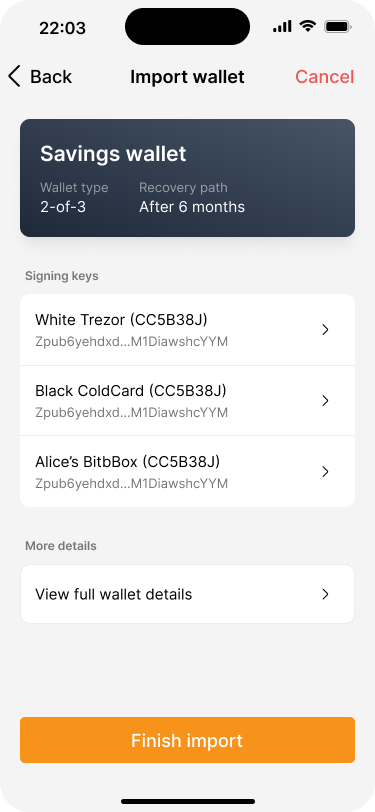
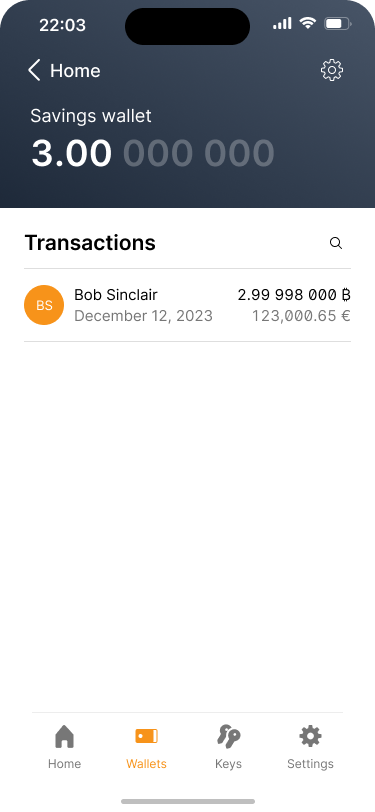
There is one final step before Alice and Bob can start using their new savings wallet: Alice nees to import the newly created wallet to the wallet application on her phone. To make this experience easy and seamless, the application allows Bob to share the wallet configuration with Alice in two main ways:
- By displaying a QR code that Alice scans with her app.
- By sharing the wallet backup file.
Spending from the wallet #
Creating transactions and spending from the wallet works like with any other multi-key wallet. We have covered how this works on the savings wallet reference design, if you would like to learn more.
Managing the recovery path #
As mentioned above, recovery paths are powered by timelocks. Technically, however, these timelocks are not applied at the wallet level but at the UTXO level. This means that every UTXO has its own timelock, based on the time when it was deposited into the wallet.
To prevent the recovery path from kicking in and refreshing the timelock, a UTXO has to be spent and re-deposited back into the wallet. Please refer to the custom spending conditions page for more information about how timelocks work.
Preventing recovery path activation #
So if Bob has three UTXOs in his wallet which he received at different times, he actually needs to refresh three different timelocks. This can quickly become cumbersome and costly, as every refresh transaction implies on-chain transaction fees.
To reduce this complexity, our application offers a “unified” timelock reset experience by default. This simply means that it uses the UTXO that is closest to being unlocked as the trigger to start the process. In the background, however, all UTXOs are automatically batched together.
This allows us to show only one timelock, which makes it easier to understand for users and is more in line with their expectations. An added benefit of this approach is that, as a result, Bob has only one UTXO in his wallet after the recovery path has been reset.
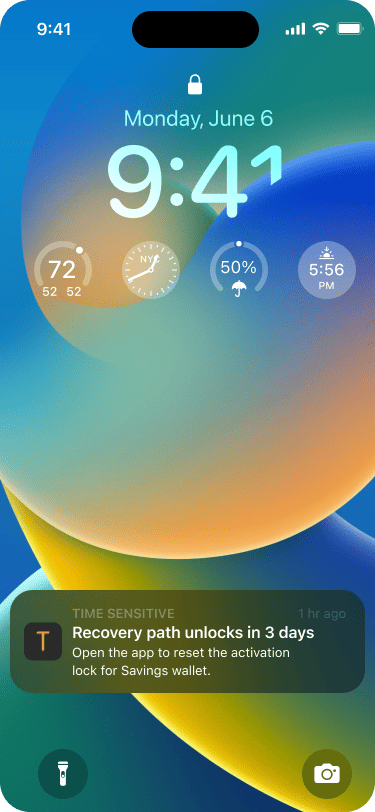
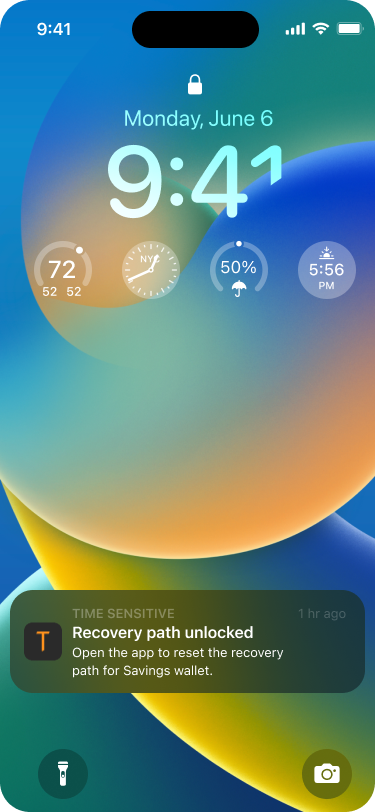
A system push notification informs the user that a key set is about to be activated.
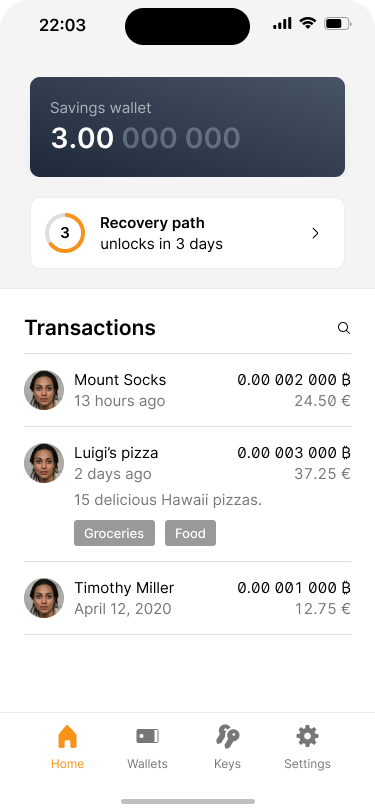
The home screen shows the same message. It will be skipped, if the user taps on the push notification.
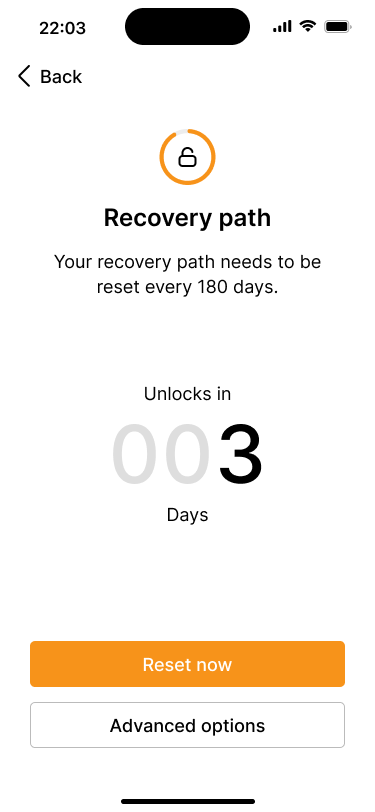
The recovery path overview screen shows a countdown of when the recovery path will be unlocked, along with the option for a simple reset or advanced options.
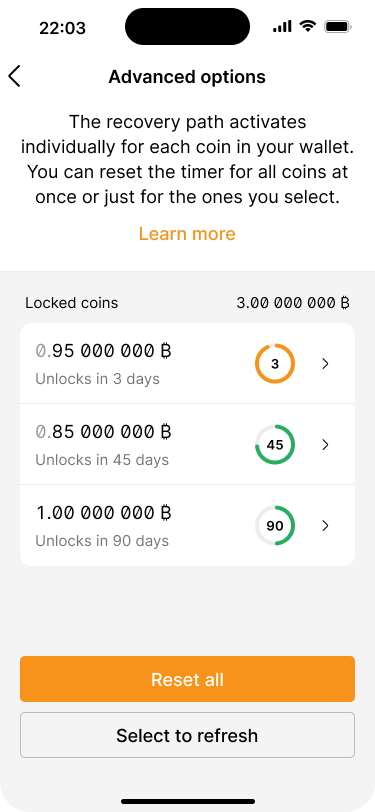
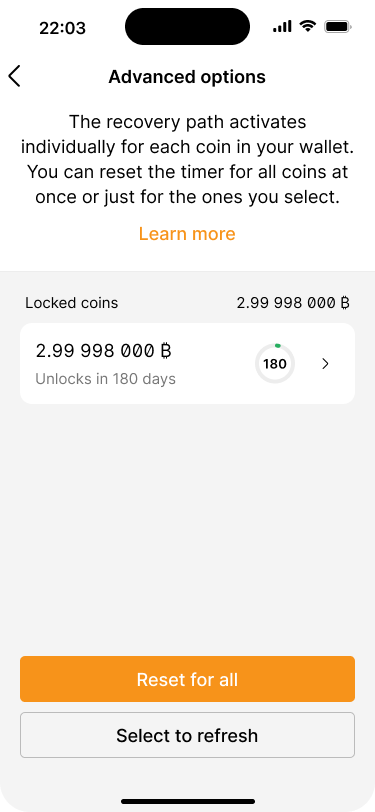
The advanced options screen shows a list of all UTXOs and a countdown of when the recovery path activates for each of them.
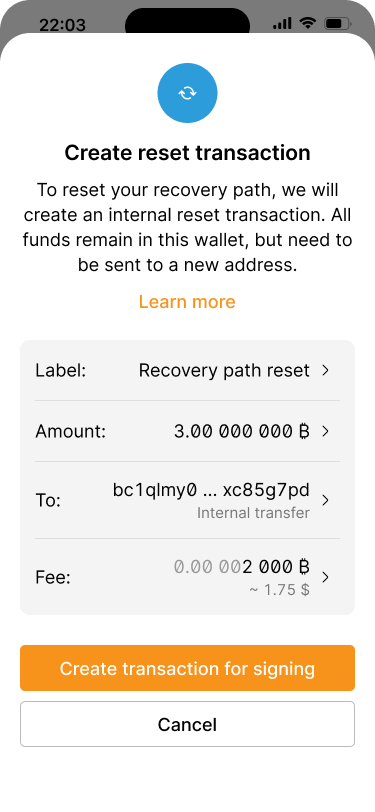
The transaction review screen tells the user that an internal transaction is required to refresh the key set and provides the corresponding details.
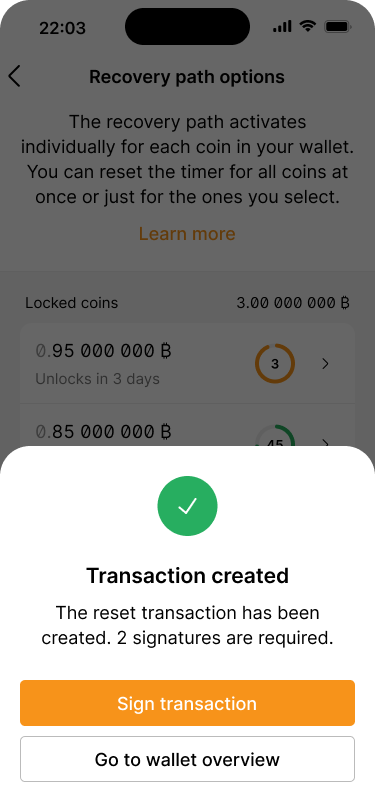
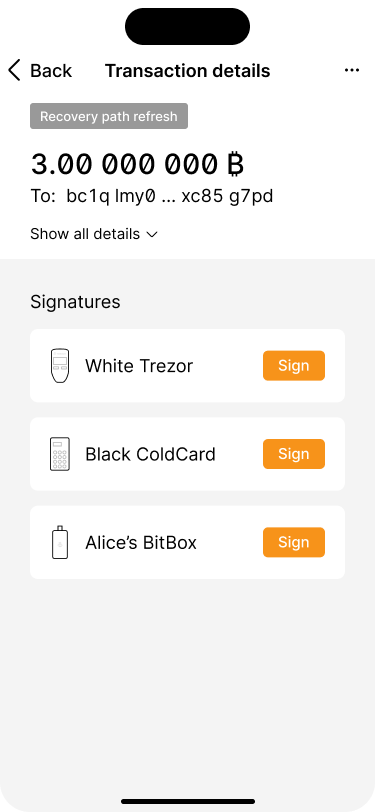

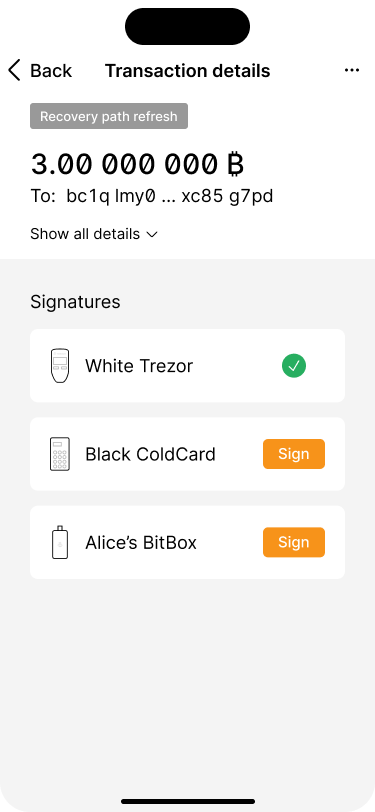
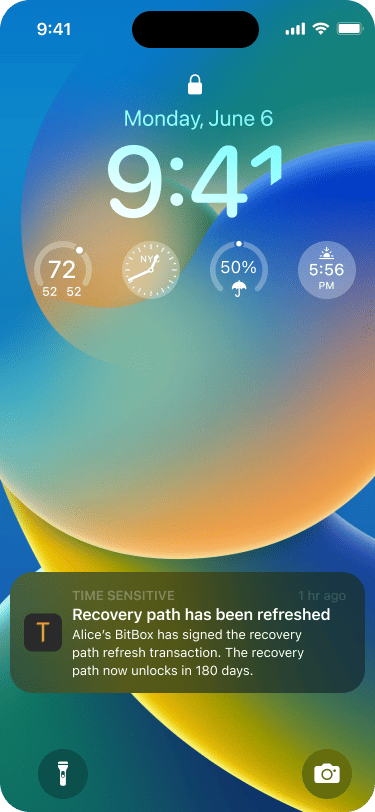
As soon as the refresh transaction has been signed by Alice, Bob receives another push notification.
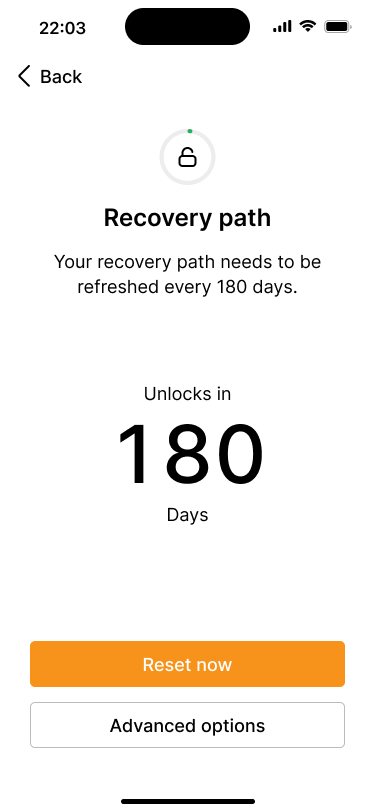
The counter has been reset to 180 days.
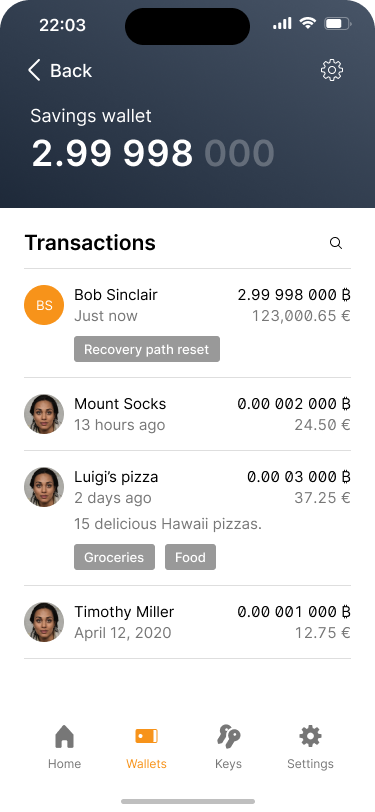
The advanced options screen shows that funds have been consolidated into one UTXO which expires in 180 days.
To give users additional flexibility, our application allows users to selectively manage the refresh behavior for individual UTXOs via the advanced options feature. This is similar to the coin control functionality available in many wallet applications.
Resetting an activated recovery path #
Just because a recovery path has been activated does not mean that it’s too late. Bob can always refresh it simply by creating the same self-transfer outlined above.
In the screen flow below, Bob uses the unified “reset all funds” feature to reset the recovery path. This means that the corresponding transaction requires two signatures, because for some of the funds the recovery path is not yet unlocked.
If he choses to reset the unlocked funds only, he will need only one signature. However, this would not reset and consolidate all UTXOs.
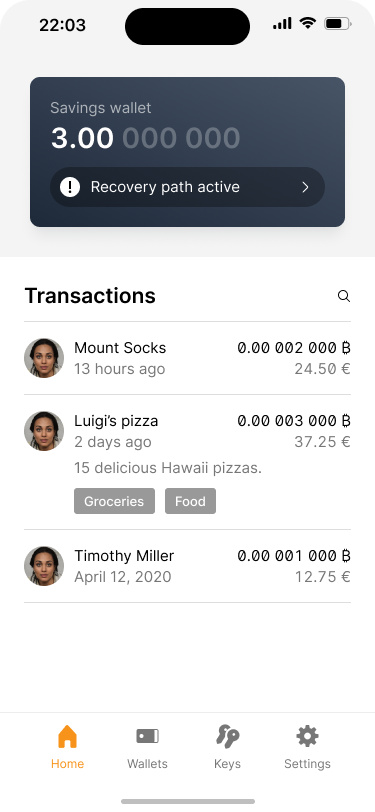
The wallet home screen shows a notification that the recover path is active.
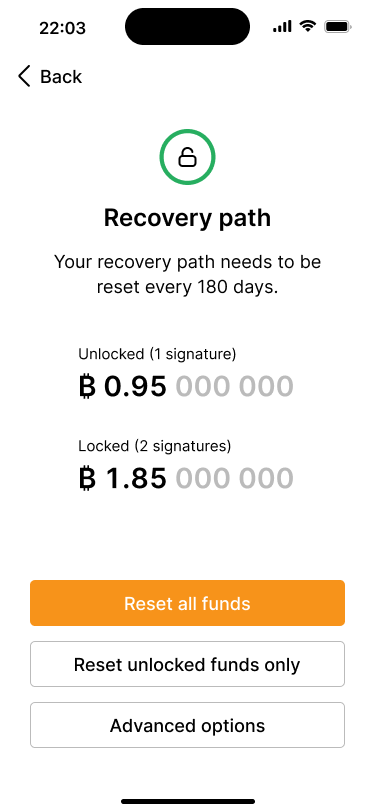
The recovery path screen shows how much of the funds can be spent under the recovery path with 1 signature.
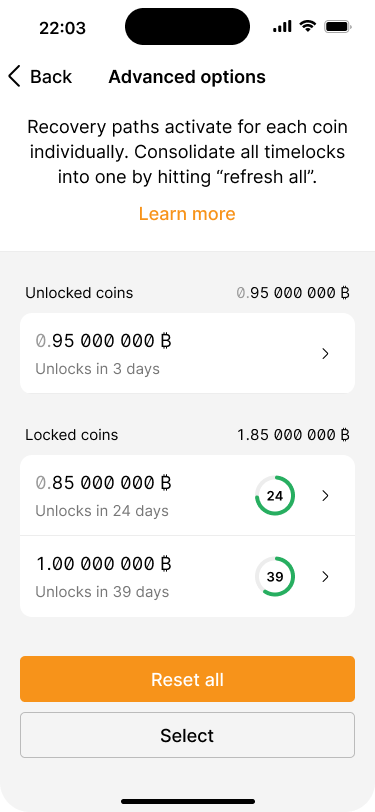
The advanced options screen shows which UTXOs are unlocked and which are still locked.
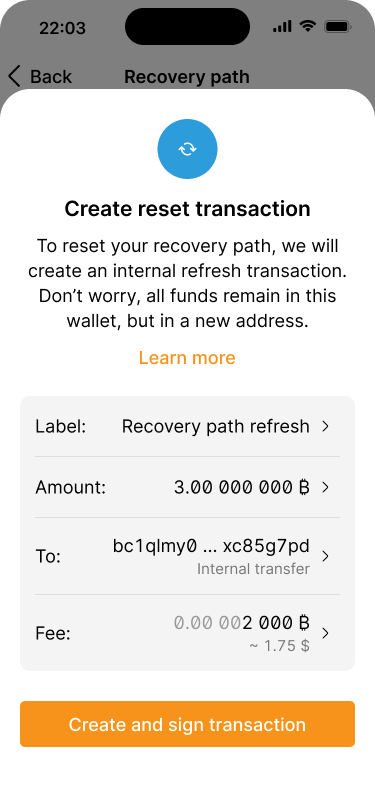
The application tells the user how the recovery path reset works. In the background, UTXOs will be consolidated.
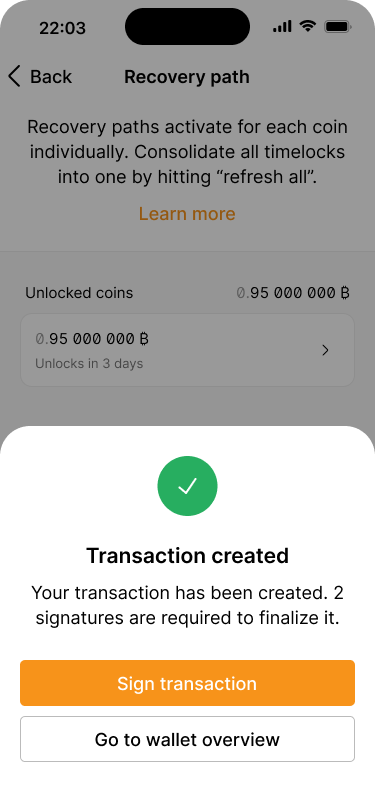
The transaction has been created and is ready to be signed.
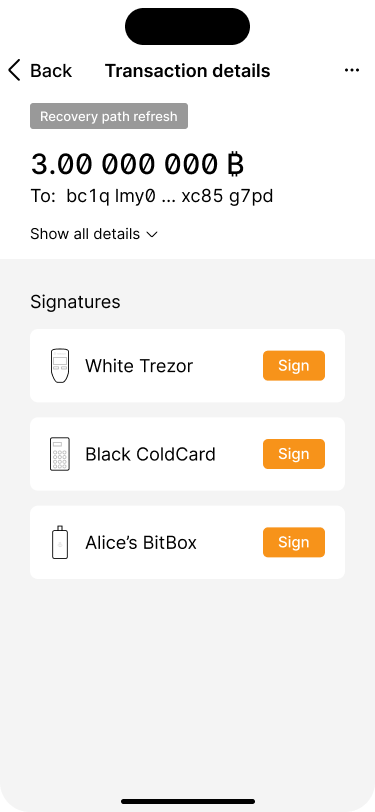
The transaction has to be signed by two signing devices.

Bob runs through the signing flow on his Trezor.
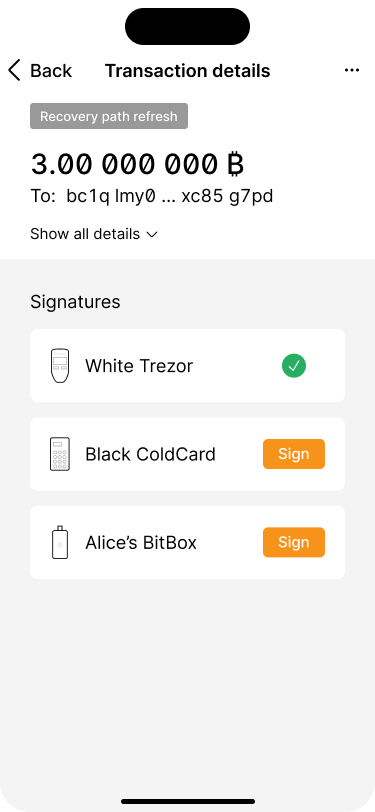
Bob has signed the transaction with his Trezor.
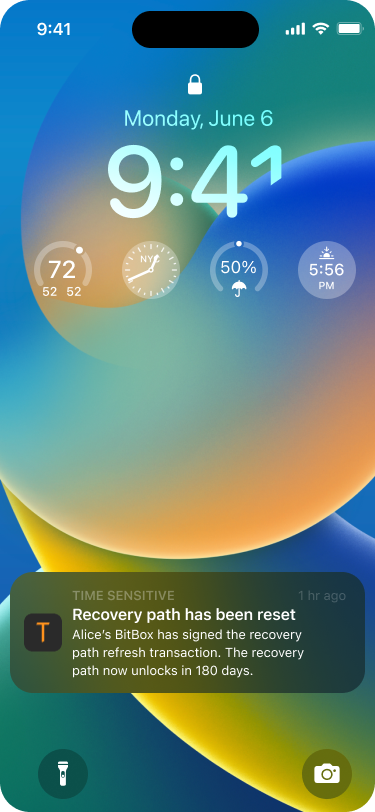
As soon as Alice has signed the transaction as well, Bob receives another push notification.
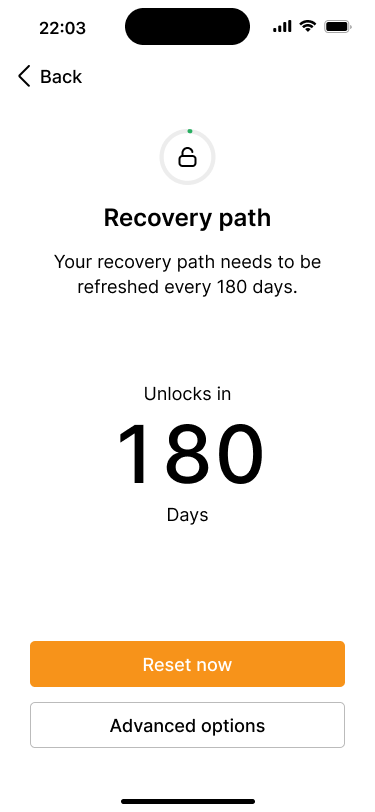
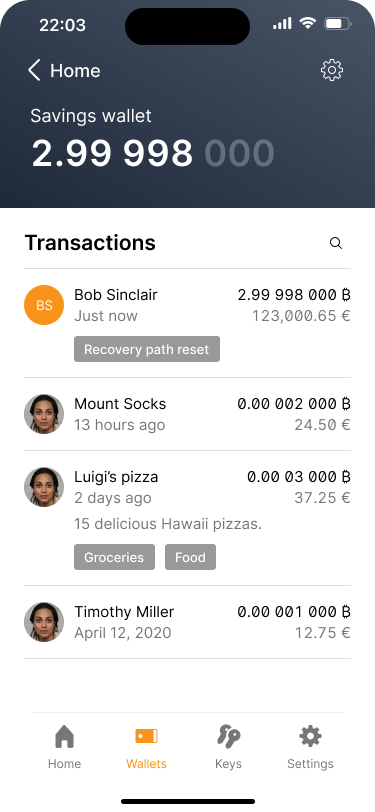
The recovery path has been reset and activates in 180 days.
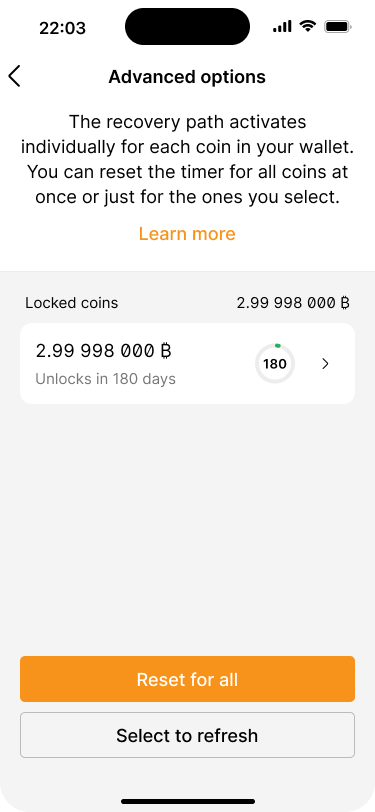
The advanced options screen shows that all UTXOs have been consolidated into one.
Wallet recovery #
Switching to a new phone or computer #
One of the most likely reasons to recover a wallet is that users switch to a new phone or computer. This means that they have to re-install the wallet application and recover the wallet. As long as Alice is using the same signing device as before, all she has to do is to import the wallet in the same way as described in the co-signer onboarding section above.
Replacing a signing device (using the same private key) #
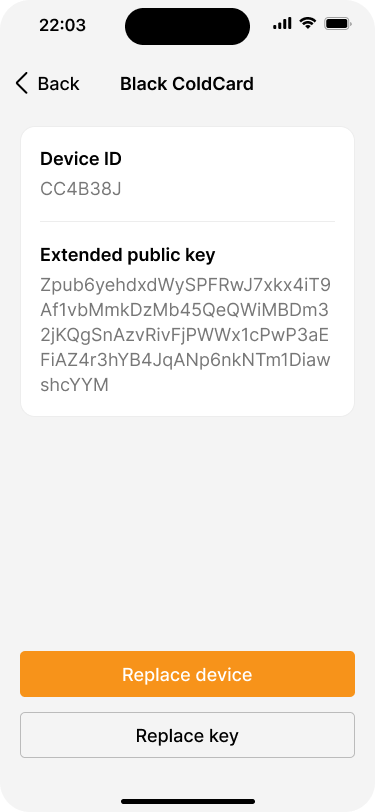
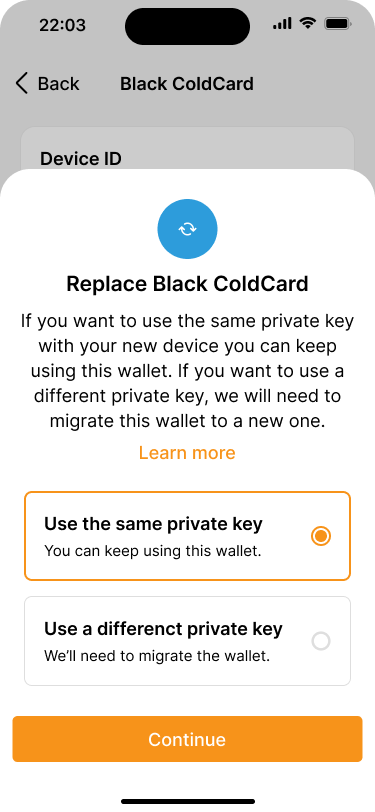
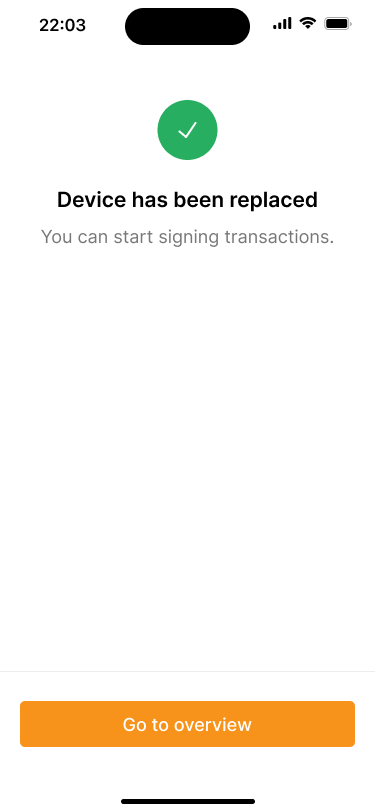
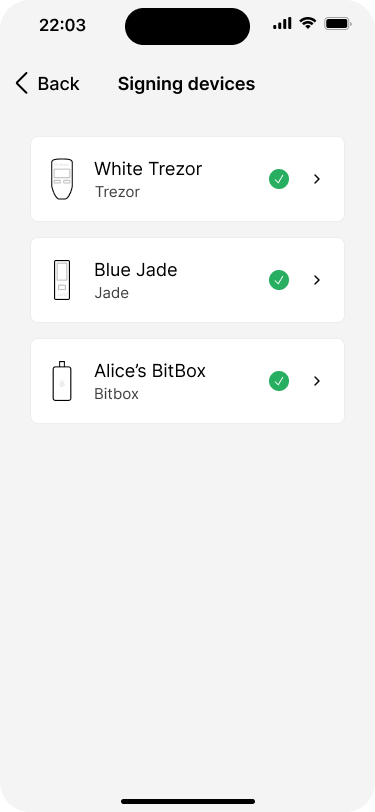
If Bob wants to replace one of the signing devices he can use the new device with the same wallet, as long as it uses the same private key as the original one. This might become necessary because the original device is broken or Bob just wants to use a newer model. To do that, he will need to:
- Restore the private key on the new signing device, using the seed phrase backup.
- Pair the new signing device.

Conclusions #
Design considerations #
- Preventing recovery key sets from activating unnecessarily is an important aspect.
- Understanding the concept of timelocks and UTXOs, as well as how they relate to each other, is a challenging topic for most users.
- Well-crafted educational and help content will be critical.
- Guide users to not create overly complex setups with too many key sets or activation rules.
- Allow for unified timelock reset experience.
- Provide templates for easy access to common key set configurations.
Technical considerations #
- Complexities of multi-key setups.
- Saving not yet created wallet configurations on the application layer.
- Using Taproot for better privacy and transaction economics.
- Batching transactions to consolidate UTXOs vs. coin control and selective timelock refresh.
Resources